Hatching new scientists every day!
Curriculum Overview

Curriculum Overview

In this three-week curriculum, children explore the science of ramps and movement:

            Week 1: Roll or Slide?
            Discover how different objects move on ramps.

            Week 2: Building More Ramps
            Create ramps that are smooth, rough, steep, and fast.  

            Week 3: Ramps, Rides, and Roller Coasters
            Invent games and rides that jump, swerve, and zigzag.

Roughly one to two hours (70–110 minutes) of science exploration is offered throughout a day. The day is broken into four segments:

            Morning Circle (25–35 min.)
            Read a story or watch a PEEP video (15–20 min.). 
            Then do a short, hands-on activity (10–15 min.).

            Learning Centers (15–30 min.)  
            Give children time for free exploration at 4–5 different learning
            centers.

            Guided Activity (20–30 min.)
            Guide children through a longer, hands-on activity.

            Closing Circle (10–15 min.)
            Get together and share the day’s discoveries. 

Learning Goals

Learning Goals

Science Concepts 

As children explore ramps, they will begin to understand the following key science concepts:

  • A ramp is a surface with one end higher than the other.
  • An object placed on an inclined plane will roll, slide, or stay put.
  • The shape of an object affects whether it will roll or slide or stay put.
  • Objects that slide are more likely to move on steeper inclines, and both rolling and sliding objects move faster down steeper inclines.
  • The motion and speed of a rolling or sliding object is affected by the shape of the object and texture of the object and the texture of the surface on which it is rolling or sliding.
  • When a rolling or sliding object hits an obstacle, it will stop or slow down and its direction may change.
  • When a stationary object is hit by a rolling or sliding object, the force may knock the object over or cause it to move depending on how fast the object is going and how heavy it is.

Children will practice scientific skills as they learn about ramps and rolling and sliding objects. They will:

  • observe and describe the way objects move when they are placed on ramps of different steepness and when they hit other objects.
  • predict and compare the behavior of objects that roll versus objects that slide.
  • predict, measure, and compare how different objects roll on different surfaces.
  • do simple experiments, talk about cause and effect, and share ideas.

Language and Literacy 

Vocabulary

  • Through hands-on experiences and discussions, children will become familiar with nouns such as ramp, incline, and obstacle and action verbs such as roll, slide, bounce, and swerve.
  • They will also hear and use descriptive words such as steep, less steep, smooth, bumpy, round, flat, heavy, light, hard, soft, far, farther, more, and fewer.
  • Inquiry verbs will be an important part of their science conversations about ramps, rolling, and sliding. These verbs include watch, observe, predict, measure, count, compare, sort, describe, identify, share, notice, test, discover, and question.

Print Awareness

Children will see their words written on charts. They’ll listen and “read” along as the words are read back to them.

Book Experiences

They will listen to read-aloud books about ramps and rolling and explore books independently.

Emergent Writing

They will draw and write about their ramp constructions and their experiments and discoveries.

Early Math 

Children will count blocks as they increase the height of a ramp (one block high, two blocks high, three blocks high...).

Categorize

Children will test and sort objects into groups, for example: objects that roll and objects that don’t roll; objects that have at least one flat side and objects that don’t; objects that roll or slide straight and objects that don’t; etc.

Compare

Children will compare the shapes of objects that roll and objects that don’t roll. They will compare the steepness, length, and texture of various ramps, and identify objects that are bigger or smaller, heavier or lighter.

Measure

Children will compare the distances objects roll on different surfaces. They’ll mark and compare the distance an object rolls each time they increase the steepness of the ramp using chalk or tape.

Materials

Materials

Below is a list of all the materials you’ll need for the activities and learning centers. For the specific materials you’ll need for each activity and learning center, see the individual entries in the curriculum.

  flat ramps (introduced in Week 1): flat pieces of cardboard, foam core, and/or wood

  tube ramps (introduced primarily in Week 2): cardboard tubes of different lengths—paper towel, toilet paper, wrapping paper, mailing tubes; cut some of the tubes horizontally to form open troughs

  flexible tube ramps (introduced in Week 3)—foam pipe insulation is ideal (1-inch diameter works well for large marbles), which can be found in hardware stores; these can be cut in half to make open troughs

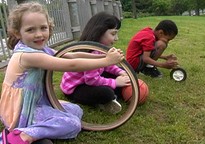
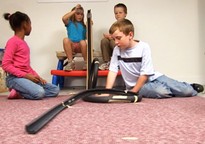
  wide, flexible hoses from shop vacs or sump pumps (look for these in the plumbing section of hardware stores)

  PVC pipe, pieces of gutter, wooden trim (the ones with a trough in the middle keep balls nicely in the track!)

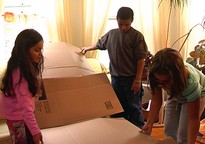
  boxes, building blocks, and other objects for supporting the ramps

  a variety of balls of different sizes and weights—beach ball, kickball, tennis ball, ping pong ball, Wiffle ball, golf ball, football, etc.

  wheeled objects (small toy cars, wagons, etc.)

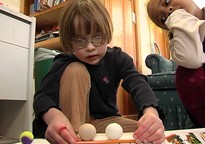
  marbles, large size (25 mm), not the smaller (16 mm) size

  a collection of nonspherical objects that roll or slide down ramps. For example, a roll of tape, eraser, marker, stuffed animal, blocks, toy cars, toilet paper roll, etc.

  objects to serve as obstacles for balls rolling down ramps: cardboard tubes, toy cars, blocks, pencils, empty spice containers, plastic cups, plastic bottles, etc.)

  camera and/or video camera

  collage and 3-D materials: craft sticks, yarn, circle-shaped stickers

  masking tape

  paste, tape, and/or glue

  scissors

  pencils, crayons, markers, and chalk

  white printer paper and colored construction paper

  chart paper

  clipboard

Safety Issue: Marbles 

Because marbles can be a choking hazard to children, it is important to closely monitor children when they play with them. Use only large size (25 mm) marbles. Make sure children understand not to put marbles in their mouth. If your family child care has infants and toddlers, provide them with alternative ramp activities that use larger sized balls. 


Videos and Games

Videos and Games

Videos: PEEP Episodes

These animated videos about ramps are used in the curriculum.

The Whatchamacallit (9:00)

Peep, Chirp, and Quack discover the thrill of zipping down a slide-quite accidentally!

Snow Daze (9:00)

Here's one more flaw in duck design: unlike beavers, ducks can't slide on their tails. (Or make great art.)

Marble Mover (9:00)

Peep discovers that if you ever need help getting a marble up a hill, all you need to do is “Ask a Duck.”

Videos: PEEP Live-Action

These live-action videos about ramps are used in the curriculum.

Down They Go (1:30)

There's a big hill in the park. The kids are rolling things down the hill to see what goes the fastest and the farthest.

Homemade Hill (1:30)

The kids have found something fun to do inside. With the couch, some pillows and an old blanket, they make a home made hill to slide things down. Why do some things slide better than others?

Ramp Rolling (1:30)

Kids build ramps with everyday objects and invent a bowling game.

Building Ramps (1:30)

The kids roll marbles down cardboard ramps and foam tubes, then experiment with the height and shape of their ramps. “Try making ramps and tracks for marbles and little balls.”

Peep Online Game

This PEEP online science game about ramps is featured in the curriculum.

Quack's Apples

Quack wants to get his apple to fall into the water, but there are sticks blocking the way!


Books

Books

These books are used in the curriculum. They are available in bookstores or from the library.

Adams, Diane. Zoom! Peachtree Publishers, 2005.
Roller coaster rides are fun and scary!

Ashman, Linda. Samantha on a Roll. Farrar, Straus, and Giroux, 2011.
Samantha takes a trip down a steep hill on roller skates.

Cowen-Fletcher, Jane. Mama Zooms. Scholastic, 1995.
Mama’s wheelchair zooms everywhere.

Dahl, Michael. Roll, Slope, and Slide. Picture Window Books, 2006.
Discover different kinds of ramps we use in our everyday lives.

Frazee, Marla. Roller Coaster. HMH Books for Young Readers, 2006.
Travel down big hills and loop-de-loops on a thrilling roller coaster ride!

Lewis, Kevin. The Runaway Pumpkin. Orchard Books, 2008.
A giant pumpkin hurtles down the hill on Halloween.

Norman, Kim. Ten on the Sled. Sterling, 2010.
Ten adventurous animals speed down a slippery snowy slope.

Additional Books (Optional)

You may want also want to share these books with children.

Piper, Walter. The Little Engine That Could. Grosset & Dunlap, 2012.
Can the little blue engine make it over the mountain?

Steig, William. Brave Irene. Farrar, Straus and Giroux, 1982.
Irene travels through a raging snowstorm to deliver a package for her mother.

Handouts for Parents

Handouts for Parents

In the first week of the Explore Ramps curriculum, print this letter and send it home with children’s parents or guardians. The activities in the letter give families and children ways they can enjoy science together. The letter also gives book and Web site recommendations. During the Morning Circle, invite children to share their at-home science discoveries with the group.

Each letter is provided in English and Spanish:

Explore Ramps with Your Children
Explora las rampas con los niños

For parents new to PEEP, there’s also a handout with tips for:

Exploring Science with Children
Exploremos las ciencias


Educator Reflection

Educator Reflection

These questions may help you think about the successes and challenges of the Explore Ramps unit.

  1. What was the most satisfying part of the Explore Ramps unit for you and your students? Building long ramps? Sending objects down the playground slide? Something else? What made it so satisfying?
  2. As you watched and listened to your children explore, what things surprised you? (For example, certain questions or observations about ramps and rolling, unusual ways children used the materials, special things that fascinated them.)
  3. What activities would you change or extend the next time you use the Explore Ramps unit? What would you keep the same? How could you build on your children’s particular interests and enthusiasm to make it an even richer science learning experience?
Educator Close-Up

Educator Close-Up

Sometimes the best lessons are unplanned. This morning I brought in a box of materials to launch our indoor ramp explorations. Micah, who was an early arrival, noticed the box and began to get to work. He set up tubes and sent balls down. As the rest of the students arrived, they joined him in sending different types of balls down the tubes, noticing how far they rolled. In these “races,” the tennis ball was always the “winner.” “Why do you think that is?” I asked. The students began thinking about how the objects were rolling and why they were stopping. One child said, “The tennis ball is the heaviest ball, it rolls slowly but goes far.” He had already generated an idea to explain what he was observing! What a great way to start our indoor ramps exploration!

One group asked my co-teacher to help them shape the hose into a circle and trap a marble inside. The children figured out how to move their arms to make the marble roll inside the circle track. It took real teamwork! The hose had ridges, and the marble made a cool sound as it rolled around the track. The children could figure out of where the marble was by listening to the sound.

—Kira, preschool educator

Aiden made a ramp with a chair and cardboard tubes.
Zoe made a ramp from foam board, blocks, and shoeboxes.
Eli, Isabella, and Leon used blocks, cardboard tubes, shoeboxes, and foam board.
A group shaped a flexible hose into a circle and sent a marble twirling inside it.

Prepare To Teach

Prepare To Teach

Introduction

  • Print the interactive PDF of the Curriculum Planner to familiarize yourself with all three weeks of the curriculum. (Clicking on the activities in the PDF will open up a page featuring the activity.)
  • Then roll up your sleeves and explore some of the same hands-on activities your children will try during the curriculum.
  • Review the Using Media sections for tips on reading books, watching videos, and playing online games together.

Hands-on Activities

When was the last time you played on a slide? Here’s a chance for you to revisit the fun. A slide is just a big ramp, so grab a teaching partner, or a willing friend, and explore ramps together, both indoors and outdoors.   

These hands-on activities will help you:

  • discover new things about ramps and the way things roll or slide down ramps and other inclined planes
  • make observations about how things roll and slide in different environments and situations

They will also help you to:

  • think about ways you can help your children get the most out of their ramps and rolling explorations: vocabulary you might introduce, questions you might ask, and ways that children can represent their discoveries
  • troubleshoot problems that may arise when the children use the materials

Outdoor Ramps 

Gather together: 

  • several balls of different weights and sizes (including large marbles)
  • small objects, such as a marker, building blocks, and chalkboard eraser
  • lengths of cardboard or wood  
  • cardboard tubes
  • flexible foam insulation for pipes
  • PVC pipes and/or flexible hoses
  • some boxes
  • a clipboard, paper, and pencil for taking notes  

Then head outside.

Survey the Possibilities

  1. Walk around your outdoor play area and search for ramps and other sloping surfaces. Check out playground equipment (slides, seesaws, roofs on playhouses, etc.). Do you have a sandbox in which you could build a hill of sand? Look for paved walkways, grassy and not-so-grassy hills, access ramps to the building, etc.
  2. Not sure if a paved area is flat or inclined? Try placing a marble or ball on the surface and see if it rolls downhill. Which areas are safe for rolling balls and other objects? How might you create a barrier so balls do not roll too far?

​​Roll, Slide, or Stay Put?

  1. Gather some small outdoor objects (a stick, a pinecone, a stone, etc.). What do you think will happen when you put each object on a slide (or other inclined surface)? Will it roll? Slide? Stay put? First, make a prediction, then try it out. Try each object several times. Does it always move the same way? (For example, what difference does it make if the stick is pointing down or pointing across the incline?) Discuss any surprises with your partner.
  2. Continue the experiment with your collection of small objects. Include several balls and a cardboard tube.
  3. Sort the objects into groups: those that rolled down the incline, those that slid, those that both rolled and slid, and those that stayed put. What is similar about the objects in each group? What words would you use to describe their shape, texture, rigidity or floppiness, etc.?
  4. What do you think the children will notice? How might you record the words they will use? What open-ended questions might you ask that will help them focus on the characteristics of the objects and how the objects are moving?

Explore Different Surfaces

  1. Try to find a paved area or walkway that slopes downward—if possible, one with grass or dirt next to it. Place a ball on the paved surface and let it roll downhill. How far does it go? What do you think causes it to stop?
  2. Place the same ball on the grass or dirt next to the pavement. How far does it roll on this surface? What do you think makes it stop? If you have two similar balls, you can try “racing” them on the two surfaces. What words come to mind as you try to describe the movement of the balls?
  3. What happens if you change the surface texture of the dirt or grassy area by placing a large piece of cardboard or plastic on top and then letting a ball roll down? How does the movement compare to the ball rolling down the paved surface?

Explore Different Balls

  1. Try rolling balls of different sizes and weights down paved ramps and grassy hills. What do you notice? Think about the vocabulary you are using to describe the balls themselves and how they are the same or different.

Build Ramps

  1. Outdoors can be a great place to build large-scale ramps for balls. Use cardboard tubes, flexible hoses, foam tubes, pieces of gutter, wooden trim or planks, PVC pipes, etc. to build a long track for a ball to roll down. What adjustments do you need to make so that a ball rolls all the way from one end to the other?
  2. For an added challenge, try building a track where the ball rolls uphill for a short stretch. What do you have to do to the track to get the ball to roll to the end? Or find a way to incorporate a playground slide or hill into your track construction.

Indoor Ramps 

Roll or Slide?

  1. Put a piece of foam core or cardboard on the floor and place a small object in the center. Experiment to find out how much you need to slant the foam core or cardboard before each object starts to roll or slide. What do you notice? Try this with a number of objects, noticing which ones roll and which ones slide. What is it about the object that affects how it moves?
  2. Note that a marker will roll if it is placed sideways across the ramp, but it will slide if it is placed pointing down. Can you find other objects like this? What happens if you place those object diagonally across the ramp?
  3. What do you want the children to notice? What objects will be most interesting for them to experiment with? What language might you model and encourage children to use with this activity?

Less Steep, Steeper, and Even Steeper

For these explorations, you will want to have enough space in front of the ramp for the ball to stop rolling on its own. A hallway, for instance, is a great place to set up a ramp for rolling balls.

  1. Explore how far a ball rolls as you gradually increase the steepness of a ramp. Get several equal-length pieces of cardboard or foam core to use as ramps and a supply of equal-size building blocks. Build a series of ramps side by side. Prop the first ramp up on one block, the second ramp on two blocks, etc.
  2. Try rolling a ball or tube down each ramp to see how far it goes. To make this a fair test, and control for all the variables, it’s important to just release the ball at the top of the ramp—don’t give it a push. To ensure that you release the ball from the same place each time, you can draw a start line at the top of the ramp and use a ruler as a starting gate. (Set the ball behind the ruler, then lift the “gate” and let the ball roll.) Children will quickly understand the need for “fairness” in a test. This is something they can monitor.
  3. Set yourself a challenge. Try to get a ball to roll down a ramp and stop at a certain point on the floor. Adjust the steepness of the ramp until you get it to stop at that point.
  4. Place an obstacle, or a row of obstacles—such as a tower of small blocks, a paper or plastic cup, or toy cars—a short distance from the end of one of your ramps. Roll a ball down the ramp. What happens when the ball hits these obstacles?

Using Media: Books

A few tips for reading aloud to your children.

  • Read the book several times before sharing it with children. Mark the places where you would like to pause to ask questions or explain unfamiliar words.
  • Talk about the cover. Point out the title, author, and illustrator. Look at and talk about the art.
  • Ask children to predict what might happen in the story.
  • Read the story with the children once without stopping so children can follow the story. Then read through and ask questions.
  • Read slowly so children can understand and enjoy the rhythm of the words and explore the pictures.
  • Hold the book so that everyone can see it.
  • Add drama to your reading by using different voices and simple props. Don’t be afraid to be silly or dramatic.
  • After reading the story, ask some open-ended questions (questions that don’t have a yes or no answer) that will help children think about, remember, and discuss the story later.

Using Media: Videos

Help children think and talk about what they are watching by encouraging active viewing.

  • Watch the video ahead of time so you’re familiar with it. 
  • Before viewing, tell children something about the story to capture their interest and introduce unfamiliar words and ideas.
  • While viewing, show children that you are engaged by focusing intently, laughing, showing amazement or surprise.     
  • After viewing, ask open-ended questions, such as,
    • Why couldn’t Peep and Chirp slide when the gutter was flat on the ground?
    • How did Raccoon make Peep and Chirp go even faster on the slide?
  • When children watch the live-action videos, which feature children exploring science, ask questions comparing their experiences to the children in the video:
    • Have you ever tried walking up a slide like the children in the video?
    • Is it easier to go up a slide or down a slide? Why do think that is so? 

Using Media: Online Games

Encourage children to think and talk about what they’re doing while they play the PEEP online science games.

  • Play a few rounds of the game on your own so you’re familiar with it
  • Explain the goal of the game and demonstrate to children how to play. 
  • Have children take a turn, as you guide them through the steps, and offer encouragement.
  • For the youngest children, you might guide their hands on the mouse and keyboard. They’ll have fun, develop their motor coordination, and enjoy being part of the group.
  • As children play on their own, ask open-ended questions to get them thinking.

Almost all the PEEP games are self-leveling. If players answer a round without error, they move to a harder level in the next round. If they make an error, they remain at the same level of difficulty for the next round. The games keep children within their own comfort levels, nudging them to more challenging levels only when they are ready.

Screen Time for Children

The National Association for the Education of Young Children (NAEYC) and the Fred Rogers Center state that "technology and interactive media are tools that can promote effective learning and development when they are used intentionally by early childhood educators, within the framework of developmentally appropriate practice to support learning goals established for individual children."

This curriculum uses nine-minute PEEP episodes, one-and-a-half-minute live-action videos, and online science games as a springboard for discussion about science with children. All videos and games were vetted by early childhood education experts and are presented in the context of a lesson plan that promotes active viewing. 

After children have watched the videos, played the games, and discussed both, this media is made available to children in a Learning Center. But reserve the Technology Learning Center for children older than two. NAEYC recommends you "limit any use of technology and interactive media in programs for children younger than two to those that appropriately support responsive interactions between caregivers and children and that strengthen adult-child relationships.”